Get Started
Get Started with BC X-RAY
Welcome to BC X-RAY! Follow our step-by-step guide to quickly set up the app and start using it. Choose the installation method that works best for you:
- Cloud Installation: Ideal for users who want a hassle-free setup with automatic updates.
- On-Prem Installation: Perfect for those who need full control over their infrastructure.
Click on one of the options below to get started!
Cloud installation guide
On-prem installation guide
Cloud Installation
The cloud installation is the easiest way to get started with BC X-RAY.
With minimal setup, you’ll have access to automatic updates, seamless integration, and a hassle-free experience.
Follow the steps in our guide to get up and running in no time!
Step 1
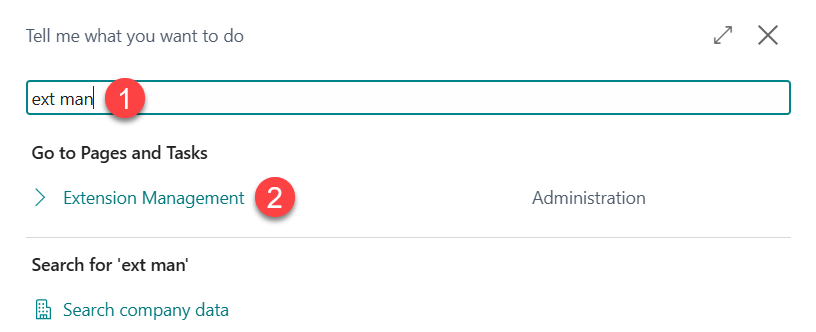
In the search bar, type “Extension Management” (1).
Once it appears in the results, click on Extension Management (2) to proceed.
Step 2
Click on AppSource Gallery in the top menu (1).
In the search bar, type “BC X-RAY” (2) to locate the app.
Once you see BC X-RAY in the list, click on it (3) to proceed.

Step 3
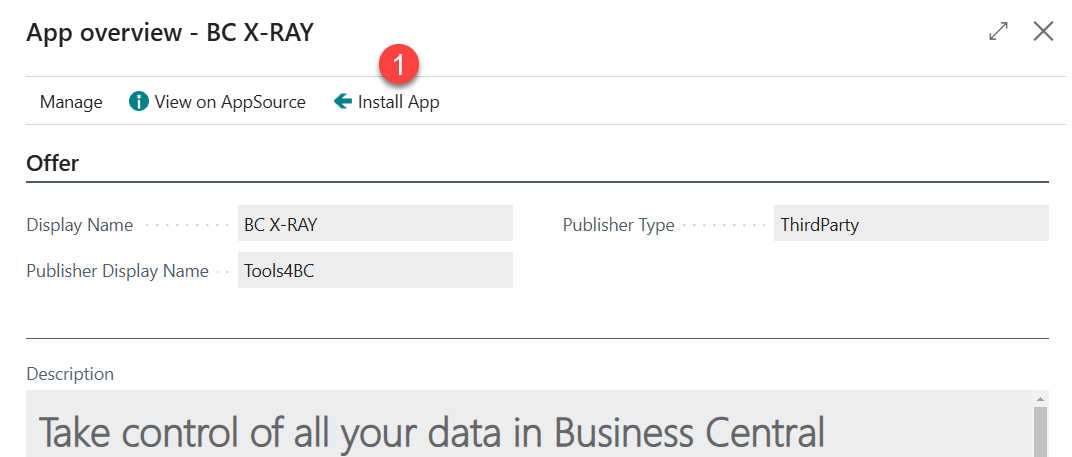
You are now on the App Overview page.
Click on “Install App” (1) to begin the installation process.
Step 4
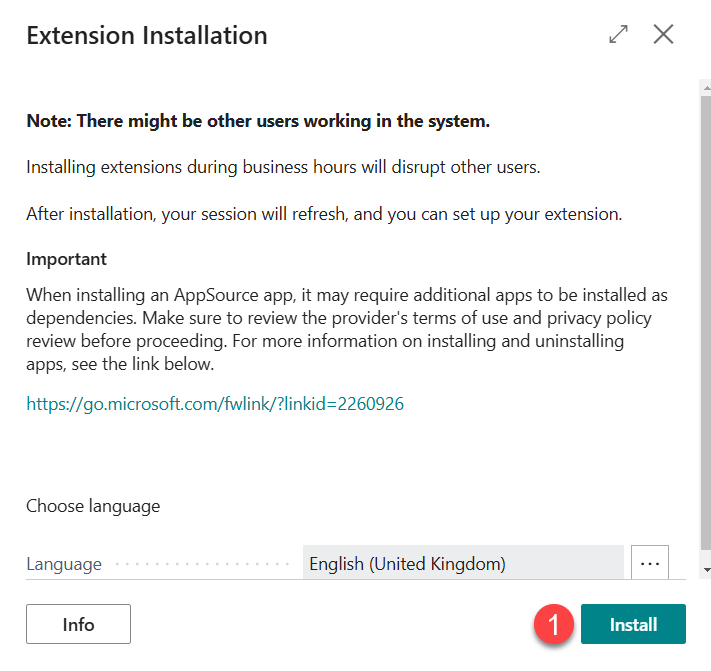
Select your preferred installation language,
then click “Install” (1) to proceed.
Step 5
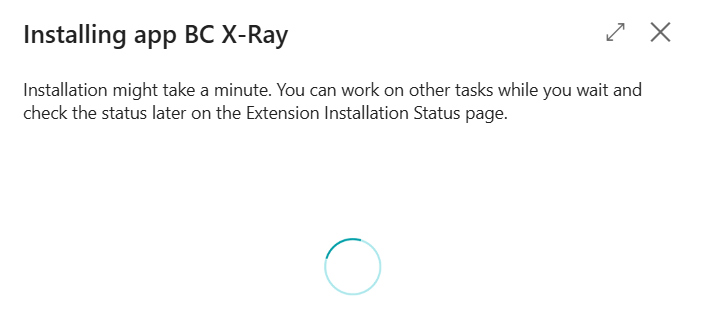
The installation of BC X-RAY may take a minute.
You can continue working on other tasks while you wait.
Once the installation is complete,
you’ll be able to access and use BC X-RAY’s powerful features in Business Central.
Step 6
Now you have installed the BC X-RAY extension!
The only remaining step is to perform the activation, then you can start your trial period and enjoy the solution.
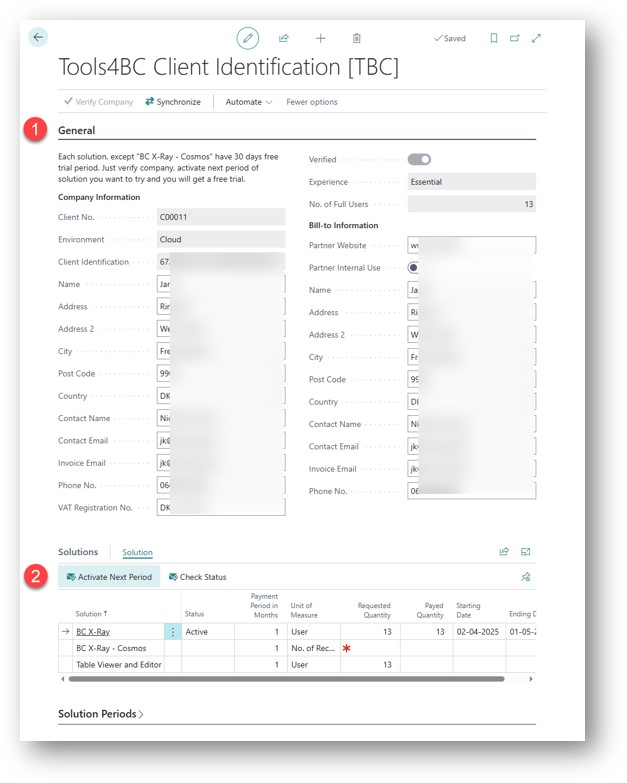
To activate the trial period, look for the page “Client Identification” and please:
(1) Fill out the missing fields.
(2) Select “BC X-RAY” and click on “Activate Next Period”.
Step 7
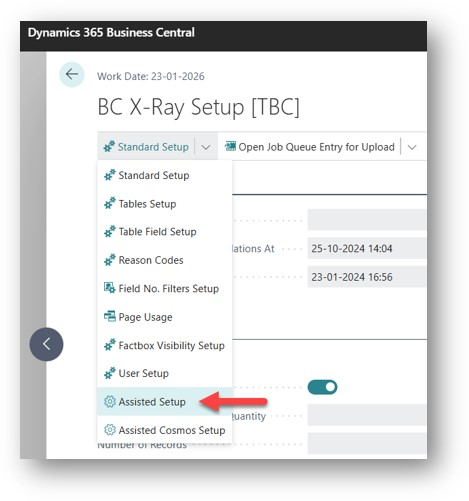
If you haven’t activated the standard change log or email,
then we also recommend you go to the “BC X-Ray Setup” page,
and run the “Assisted Setup”:
Errors can happen
If you encounter an error or bug while using BC X-RAY, please feel free to report it to us.
For a quick fix, try reinstalling the extension, as this will likely fix any potential installation errors.
Link to the user manual
for a more in-depth guide on
BC X-RAY
Link to the user manual
for a more in-depth guide on
BC X-RAY

